???
For the past several months, COVID has made staying connected with loved ones incredibly hard. Now that holiday time is here, it is even more difficult. Both of my grandmas are in senior homes and my mom is a frontline worker, so we have to be extra careful. This Christmas, I used my creativity to make gifts that would bring a lot of cheer.
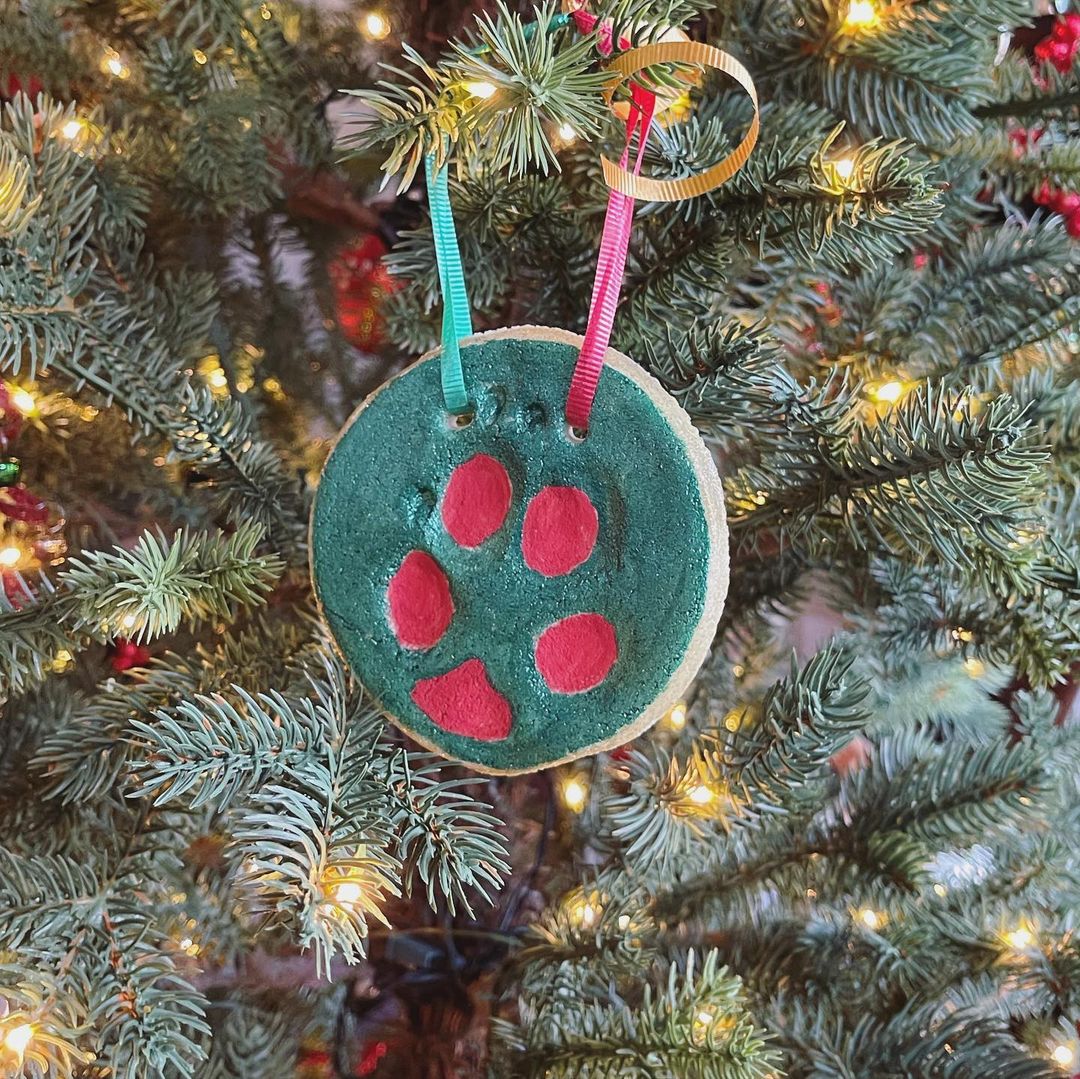
Since my family and I have been so far away from each other, I wanted to give them something that was very close to my heart. Making hand-crafted gifts was the way to go. I made prints of Dyson’s paws using salt cookie batter and turned them into Christmas tree ornaments. Then, I hand-painted one for my mom, my two grandmas, and myself. I knew my doggie DIY gifts would bring them a lot of comfort and joy.
How to make salt cookie ornaments
Salt cookie ornaments are a very easy DIY holiday craft. They can be super fun and styled with cookie cutters or they can be super personal with a child’s hand or fur baby prints.
Ingredients
- 4 cups Flour
- 1 cup Salt
- 1.5 cups Water
- Shaped Cookie Cutter
- Acrylic paint
- Straw
Instructions
- Preheat your oven to 200 degrees Fahrenheit or about 95 degrees Celsius.
- Mix together flour, salt and water. Knead for 8 to 10 minutes. If your dough starts to crack it is too dry and needs more water. If the dough sticks too much to your hands it is too wet and needs more flour.
- Roll out the dough to about 1/2 cm or 1/4 in of thickness. Thinner ornaments will bake faster and be lest prone to “puffing up” but may be a bit harder to handle. If you stick in this range you should be in the sweet spot to have a quick baking ornament that is easy to decorate.
- Use a cookie cutter or kitchen tool to get the shape you want in the ornaments. Fit as many as you can on your rolled dough.
- Using a straw, make a hole in the top of your ornaments. One hole for small ornaments and two holes about 1.5cm or 1/2 in apart for larger ornaments.
- Put the cut ornaments onto a parchment lined baking sheet and bake for 1-2 hours. If your ornaments still feel moist when you take them out of the oven put them back in for another hours. Once they look/feel baked, take them off the cookie sheet, flip them over top-side down to cool.
- Once cooled it is now time to decorate your ornaments. Ensure you cover all surfaces with acrylic paint so that you can seal the cookie. It is dough after all, but this will help it last for many years to come.
- Pro Tip: On the back of the ornament leave space to write your initials and year with a fine tipped sharpie.


Leave a Reply
You must be logged in to post a comment.